<< Back
General Structures
Radar

Radar installations allow you to see enemy troop movements within the radar's coverage. One of the saddest and funniest things for me to see is my enemy fail to build this extremely, extremely important device, especially at T1 when it only take 20 power to operate. If you didn't know already, 20 power is the output of one T1 power plant. The radar allows you to see the enemy encroaching on your base, and gives you the opportunity to mobilize and be prepared. Most people who do not build radar usually die to rushes.
T2 Radar covers a significantly larger area, with a price of 250 power, or half of a t2 power plant. Finally, T3 Omni Radar covers an extremely big area, and is capable of compromising stealth. An Omni radar will detect any unit or building within its radius, except for sea units.
Sonar
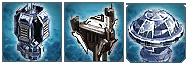
The Sonar is the sea equivalent of the radar. It is capable of detecting incoming enemy sea units, something a radar is unable to do. The sonar is especially helpful in detecting enemy submarine units. Like radar, it is upgradeable up to T3. In addition to having vast coverage, the T3 Sonar is mobile, and can move just like an individual unit.
Tech 1
Mass Fabricators
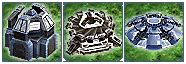
Mass Fabricators are probably one of the most underused building. The basic gist of a MassFab is that it consumes 40 power in exchange for 1 mass. Of course, using the adjacency bonus with a power plant somewhat reduces power consumption. It is questionable, however, whether or not this bonus should be used.
Building so-called MassFab farms, where MassFabs alternate with power plants are ripe for destruction. If even one MassFab explodes, the entire network goes along with it. Another form of a MassFab farm is to have it completely surrounding either a Hydrocarbon Power Plant or a T2 Power Generator. Again, if one blows up, the entire farm goes, leaving your economy in shambles.
For this reason, I tend to build T1 power plants and T1 Mass Fabricators separately. For T2 power plants, I use the adjacency bonus, but only if I cover the farm with a shield. Mass fabricators have an explosion radius of about two power generators, so if you want to space out your fabs, make sure this width requirement is met. Also, check your power consumption. If you have more +40 power or more, balance it out with some mass fabricators. It never hurts to have them since you can always turn them off if you need the power back.
Mass Storage

Mass Storage are buildings that increase your maximum total mass limit by 500 points. When built adjacent to mass building such as MassFabs or Mass Extractors, it has the capability of increasing the mass production of that specific building. The maximum adjacency bonus is 4, where output is increased by 50%. This is very helpful indeed; however, mass storage should never be built at T1. The 50% benefit means nothing at T1, and the mass used to produce the storage could be better used elsewhere.
For example, a T1 mass extractor produces 2 mass. With the maximum adjacency bonus, the mass extractor's production is brought up to 3. No, not worth it. On the other hand, a T3 mass extractor produces 12 mass. The maximum adjacency bonus brings the total production to 18. Now that's worth it! What's the underlying message here? Don't build mass storage until the late phase of T2 or during T3. Mass storage is expensive, and your resources are better spent elsewhere.
Hydrocarbon Power Plants
Hydrocarbon Power Plants are the easiest way to obtain a large amount of power early in T1. These power plants are built on power points, which are similar to mass points, except are much larger and have a lightning bolt on them. The Hydrocarbon plant provides 100 power. A lot of players like building factories next to the Hydrocarbon in order to get the adjacency bonus it provides. The real benefit of a hydrocarbon, however, is that it provides enough power to forgo building some T1 power plants. The saved resources are instead used to focus on something more important. If you play on a map with a Hydrocarbon, make sure to get one up ASAP!
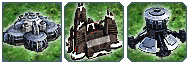
Energy Storage

Energy storage is probably the least used building in the game, and for good reason too. Energy storage increases the maximum energy by 2000. However, factories and power generators also increase the storage, albeit only by a quarter of the amount. The problem with building energy storage is that power is often so low at T1 and early T2 anyways that building storage for it is irrelevant. Sure, once you hit T3 and get some T3 power gens up, and maybe some Resource Allocation Systems for your Support Commanders, your total power will skyrocket, but nothing a few T3 mass fabricators can't fix. It's not bad to be super-positive in power anyways, since usually the limiting resource in T3 is mass. The only two real applications I've seen for power storage is for my Scathis to fire without too much power loss, and to activate a personal teleporter on an ACU, which is something that is rarely ever attempted.
Point Defense

Point defenses at T1 are very good hitting their targets without missing. When used in groups of three or more, these point defenses are pretty decent at clearing out a sizable T1 rush group. The only problem with them is that they easily fall prey to T1 artillery and T2 mobile missile launchers. Even though T1 artillery do not out-range point defenses, it only takes a few of them to kill one point defense. Even if the T1 artillery die, as long as they can fire out a shell or two, that's all that matters. T2 mobile missile launchers, on the other hand, out-range the T1 point defense making it an excellent offensive unit if you are at T2 and your opponent is still at T1.
Point defenses are also useful for fending off a comrush. When an enemy charges your base with the ACU, it is usually wise to set up a network of 3 or more point defenses in your base. Even if you have no units, the point defenses will auto target the commander and chase it out of the base. The point defenses should not be built next to each other because then it's easy for the enemy commander to Overcharge them. Remember, a commander can only solo 3 point defenses by himself. If you've been teching up and you get comrushed, you should have plenty of engineers available to build lots of T1 point defenses.
One thing that I do not see enough these days is the usage of walls around point defenses. Walls are extremely cheap and give a T1 point defense a significant defense boost since walls absorb some of the damage incurred. Walls are particularly useful against Cybran opponents, whose direct-fire lasers are not high enough to completely circumvent the wall.
Anti-Air Turret

Never, ever, ever build one of these. They are worthless and can't hit anything. Use the extra resources to make interceptors or mobile anti-air, which are far more effective.
Torpedo Launcher
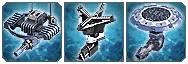
The standard torpedo launcher shoots torpedoes much like the attack sub. However, these launchers are stationary, and their torpedoes do significantly more damage than the sub ones. The best way to break through a group of these launchers is not to send a large number of subs at them (you can do that, but you usually end up losing a lot of subs). An easier way is to attack by air. If you're Aeon, you can use the T1 Aurora, since it can hover over water. If you're not Aeon, T2 torpedo bombers and T2 Destroyers are fairly effective.
Tech 2
Heavy Torpedo Launcher
Heavy Torpedo Launchers are very nasty sea defense platforms. Like its lighter counterpart, it is also stationary and can be hit from the air. However, since this is a T2 building, chances are your opponent will have T2 flak floating next to it, something you really don't want your air force flying in. The torpedos fire in rapid succession making groups of these launchers extremely hard to kill when pitted against a navy of only T2 and T1 sea units. The solution? Ensure that your T2 Destroyers and Cruisers are out of range of the T2 Heavy Torpedo Launchers since those units have a higher range. A T3 Battleship works well too.
Stealth Generator

Stealth Generators can be useful, but it is most effective for a Cybran player. A stealth generator effectively blocks radar coverage of a certain area so your opponent cannot see whats happening in the stealthed zone.
For UEF and Aeon, the problem is as soon as your engineers get into radar coverage, your opponent already sees you anyway. Thus, scouts can be sent in order to see what you're doing. As soon as your opponent scouts your buildings, they permanently remain on the map for him to see. The Stealth Generator only blocks units from your opponent's view of your individual units, but as soon as buildings are scouted, your opponent will know of your existence there.
For Cybran, stealth generators can be pretty nifty devices. Since a mobile stealth generator can be loaded onto a T2 air transport, engineers can be ferried to a remote location near the enemy's base and deploy a stealth generator. If the enemy is too lazy to scout, you can use these engineers to build whatever kind of base you want without fear of him seeing you. You'd have to be pretty quick though since as soon as a T3 Omni Radar system is online, your stealth field generator (and your hidden base) will be compromised.
